How Can We Help?
Creating an Employee
This article explains how to create an Employee record in ForeSite Manager from the Web Application.
Instructions
To create a new Employee record in ForeSite Manager, complete the following steps:
-
- Log on to the ForeSite Manager web application at https://app.foresitemanager.com/
- Once logged on, click on the Employees → Employee List link in the top navigation.

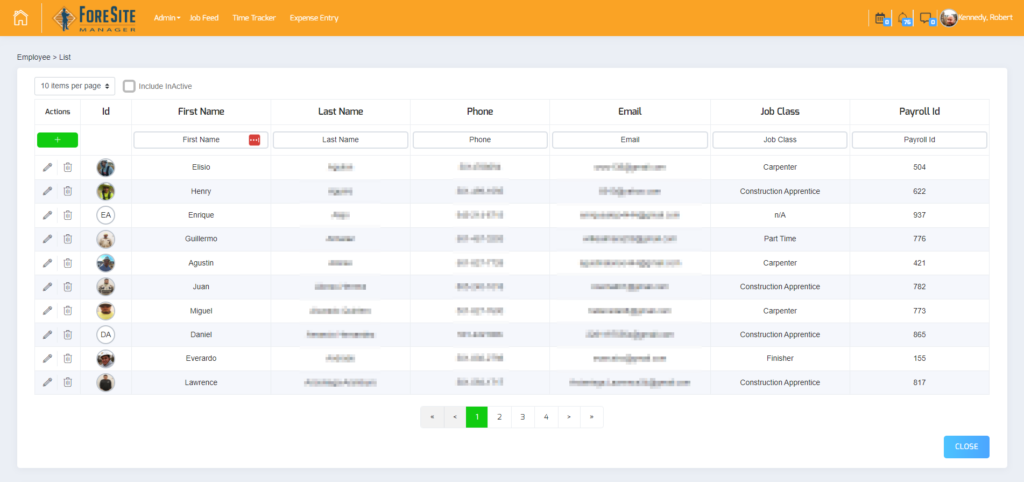
- After clicking on the Employee List link, you’ll be taken to the Employee List table.

- A few notes on the information and icons displayed.
- Add Employee – The large “+” icon at the top of the page allows the user to add a new employee to the system.
- Delete – The “trash can” icon allows the user to delete an employee record. NOTE: An employee cannot be deleted if he is on or has been on a schedule. You must remove the employee from all schedules before deleting them.
- Edit – The edit icon allows the user to edit the employee record in question.
- Column Headings – Each column heading can be used to sort the records based on the selected field. You can also use the second row as a filter for each column. Simply type the value in the column search field to search all records for that value.
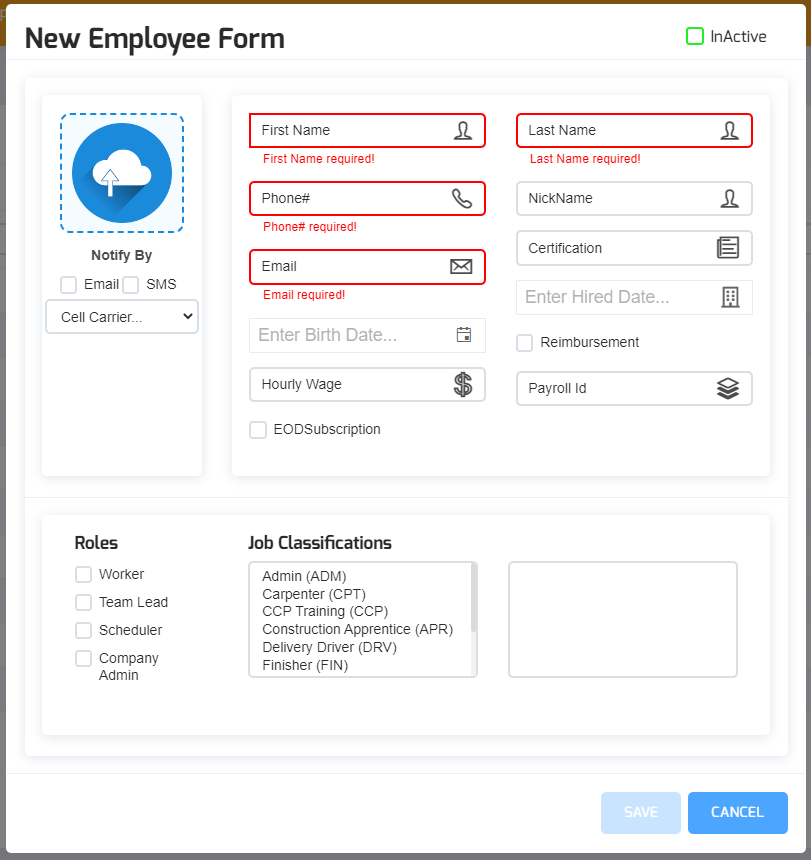
- Now that we know what we’re looking at, let’s add an employee. Click on the Add Employee icon. You should be taken to the New Employee page:

- Let’s take a look at each of these fields and what they mean:
- First Name – This is a required field. Pretty self explanatory. Employee’s first name.
- Last Name – This is a required field. Pretty self explanatory. Employee’s last name.
- Nickname – If the employee goes by something other than his first name, you can provide a nickname here.
- Phone – This is a required field. Employee’s phone number. Needed for SMS notifications.
- Email – This is a required field and must be unique. Employee’s email address. Also used as the users login.
- Certification – If an employee holds any particular certifications, they can be listed here.
- Hire Date – This is the date of the employee’s hire.
- Birth Date – Employee’s date of birth.
- Hourly Wage – Employee’s hourly rate. Used in calculating job costs.
- Payroll ID – This is the Employee’s Payroll ID as it is defined in the company’s accounting software.
- Reimbursement – Selecting this checkbox allows the user in question to submit reimburseable expenses.
- Notify By – Gives the option of how the user would like to be notified of schedules. If SMS is selected, a Cellular Carrier must also be selected.
- Cellular Carrier – Employee’s cellular carrier. Needed so that the system knows how to properly configure the notification for SMS delivery.
- Photo – Profile photo for the employee. Clicking on the “upload cloud” icon allows the user to take or select a picture for the employee in question.
- Before we can save this record, we need to assign the Employee to a Role. Currently, there are 4 Roles in the ForeSite Manager system. They are as follows:
- Worker – This is the entry level role. This role allows the user to modify his/her profile, clock in and out of jobsites, see his/her schedule.
- Team Lead – This role inherits all the permissions of the Worker role plus the ability to clock in and out any employee assigned to his/her schedule, modify time records for any employee on his/her schedule, and approve all End of Day Report tasks for his/her schedule.
- Scheduler – This role inherits all the permission of the Team Lead plus the ability to schedule employees and equipment and transfer employees and equipment.
- Admin – This role inherits all the permissions of the Scheduler and has access to do anything in the system. This includes having access to and running reports, company configuration options (Employees, Jobsites, Equipment, etc.), and access to any and all schedules.
- Go ahead and select the appropriate role for the user in questions. NOTE: Employees can possess more than one role.
- The next step is optional. Here you are able to designate primary and secondary job classifications for the employee in question. This information is used on the Dashboard when assigning employees to a schedule. Not all employees will have a job classification, but those that do can be assigned one here.
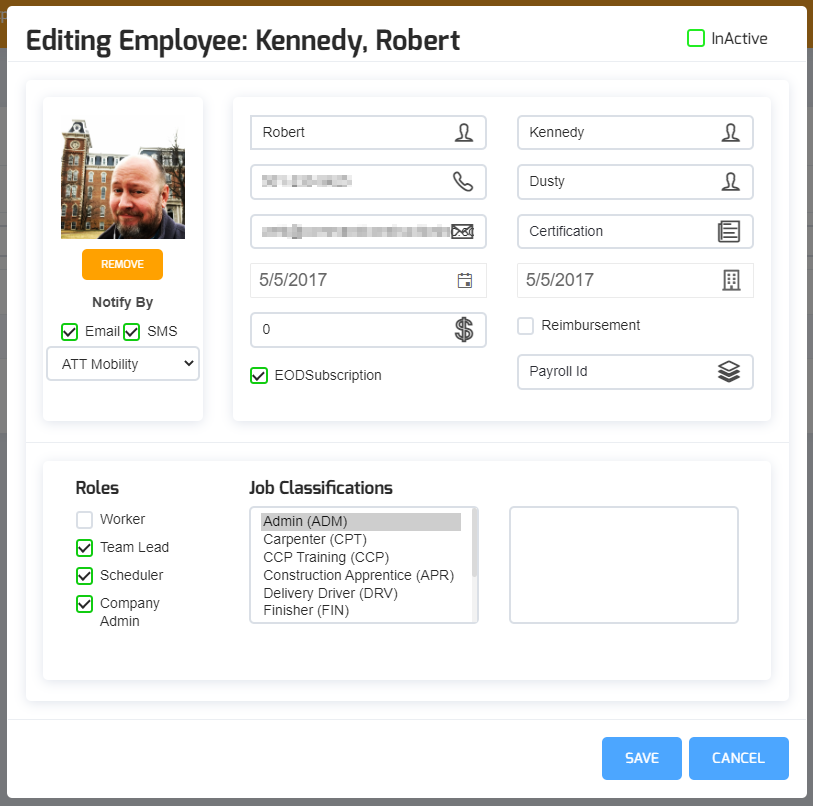
- Your completed form should look similar to this:

- Once you’ve completed all of the required fields for the employee record, click on the Save button.
- And that’s it! Congratulations! You just set up an employee in the ForeSite Manager application.
